Install Windows 11 on Steam Deck (MicroSD)
A complete guide to running Windows 11 from a MicroSD card on your LCD or OLED Steam Deck, with no PC required.
📌 Key Takeaways
- No PC Required: Everything is done directly on the Steam Deck.
- Fully Updated: The image includes the latest Windows updates and pre-injected drivers for both LCD and OLED models.
- Safe: This runs entirely off the MicroSD card and does not wipe your SteamOS installation.
Transparency Note: As an Amazon Associate I earn from qualifying purchases. This means if you click a link and buy something, I may receive a small commission at no extra cost to you.
Success with this guide depends heavily on the speed of your MicroSD card. I highly recommend using A2 V30 rated cards OR a NVMe enclosue for the smoothest Windows experience.
Recommended MicroSD Cards/NVMe enclosure:You will need these files to complete the guide:
1. Balena Etcher (Linux x64)Download the W11 Image from one of these mirrors:
NerdZap Windows 11 Image (Google Drive) NerdZap Windows 11 Image (OneDrive) NerdZap Windows 11 Image (Archive.org)Step 1: Preparation & Desktop Mode
- Remove your current MicroSD card containing your Steam games to keep it safe.
- Insert the target MicroSD card you wish to use for Windows.
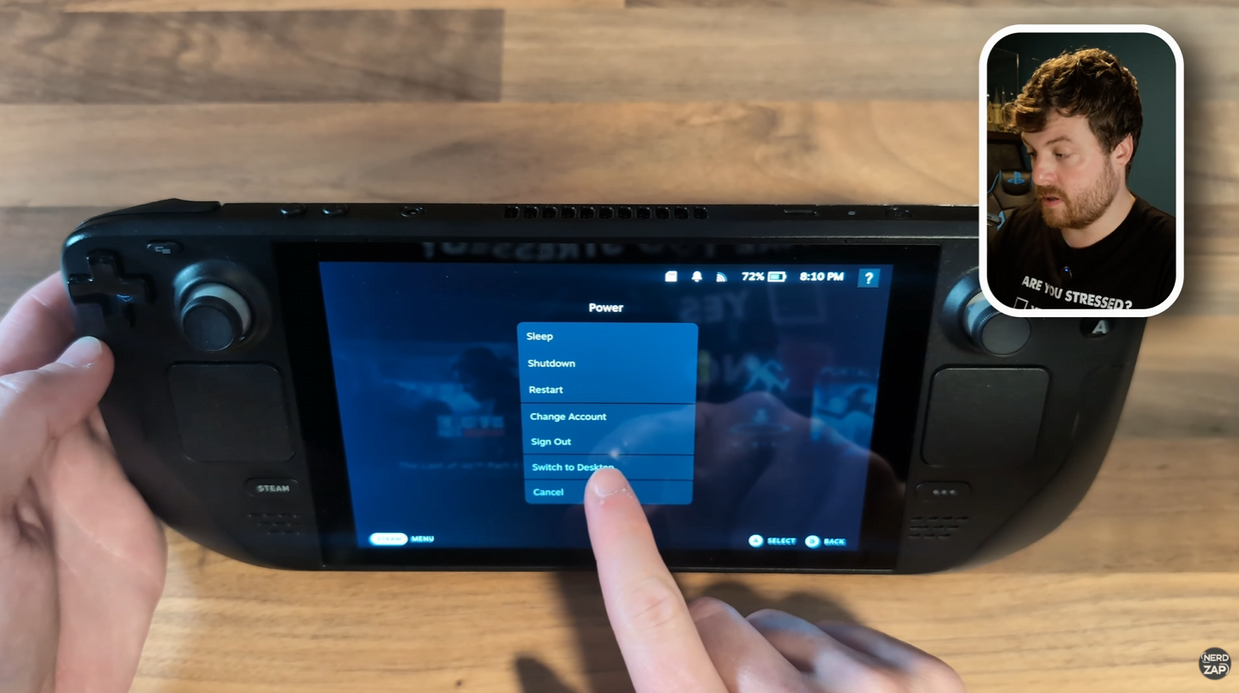
- Hold the Power Button and select Switch to Desktop.
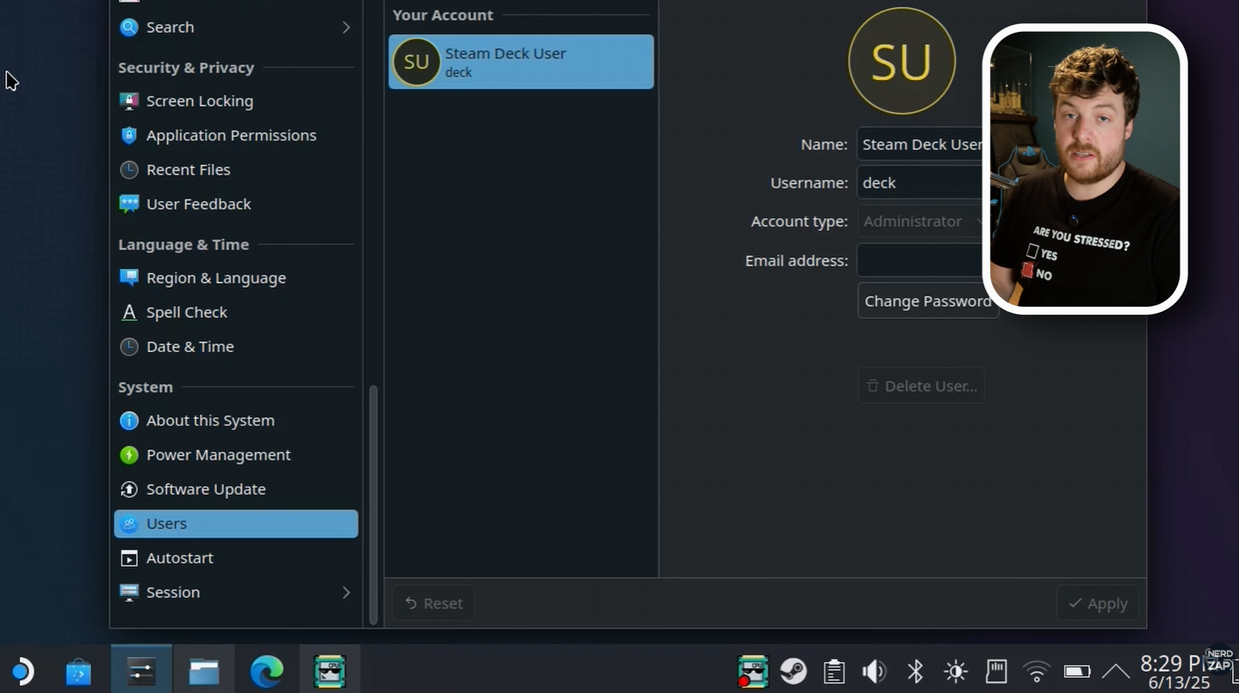
Step 2: Set Super User Password
You need a password to install software in Desktop Mode. If you haven't set one:
- Open the System Settings or click the Steam Deck User icon in the menu.
- Select Change Password (or Set Password).
- Create a password and write it down; you will need it shortly.
Step 3: Download Tools & Image
Open a web browser on your Deck and download the required files listed in the Downloads section above.
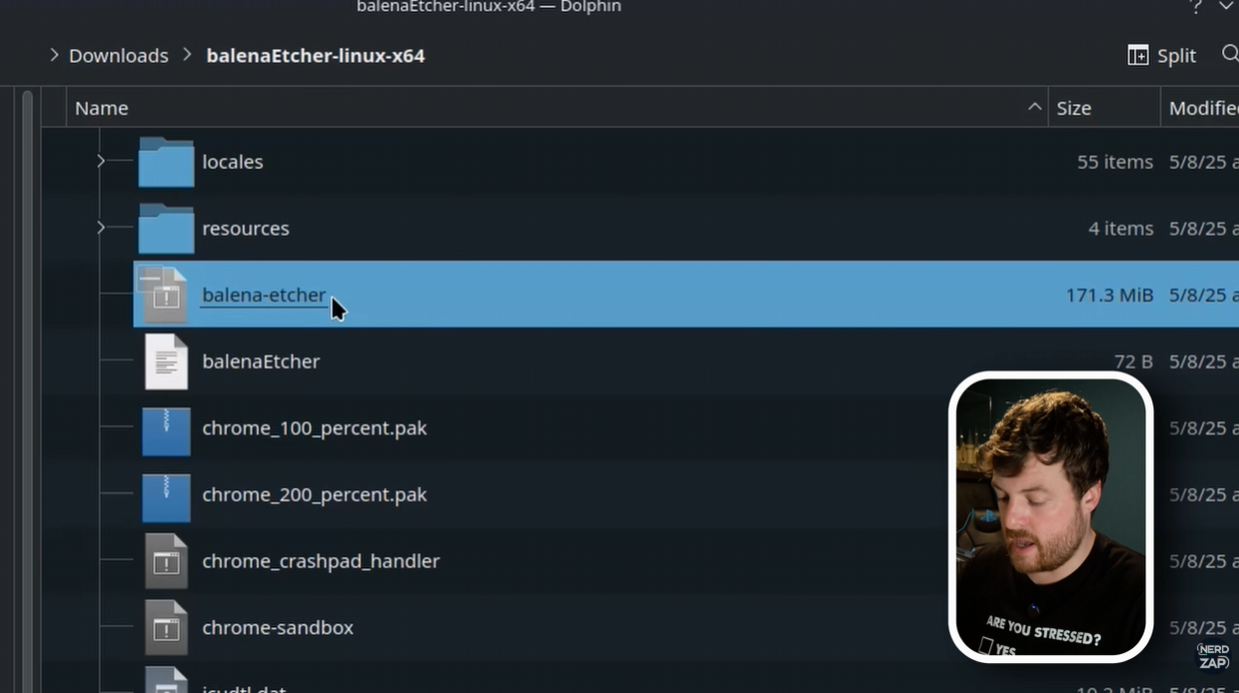
Once downloaded, open your file manager, find the Etcher zip in Downloads, and right-click > extract it.
Tip: Note: You do NOT need to extract the NerdZap W11 file. Etcher will accept the .zip
Step 4: Flash the Image
⚠️ Warning: This step will wipe all data on the MicroSD card you use for Windows.
- Open the extracted Etcher application.
- Select Flash from File and choose the NerdZap Windows 11 image.
- Click Select Target.
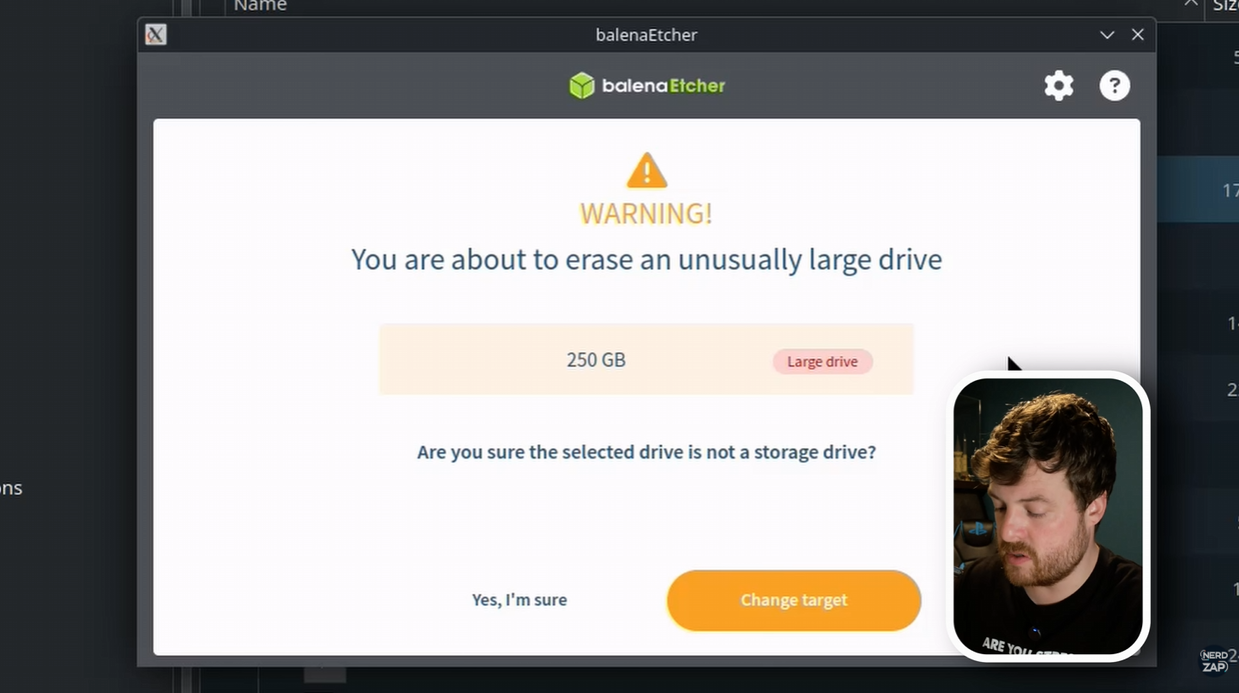
- CRITICAL: Carefully select your MicroSD card. Ensure you do not select the internal Steam Deck drive.
- Click Flash. You will be prompted to enter your Super User password.
Tip: If you get an error immediately, try typing your password faster. The prompt can time out quickly.
Step 5: Booting into Windows
- Once flashing is complete, shut down your Steam Deck.
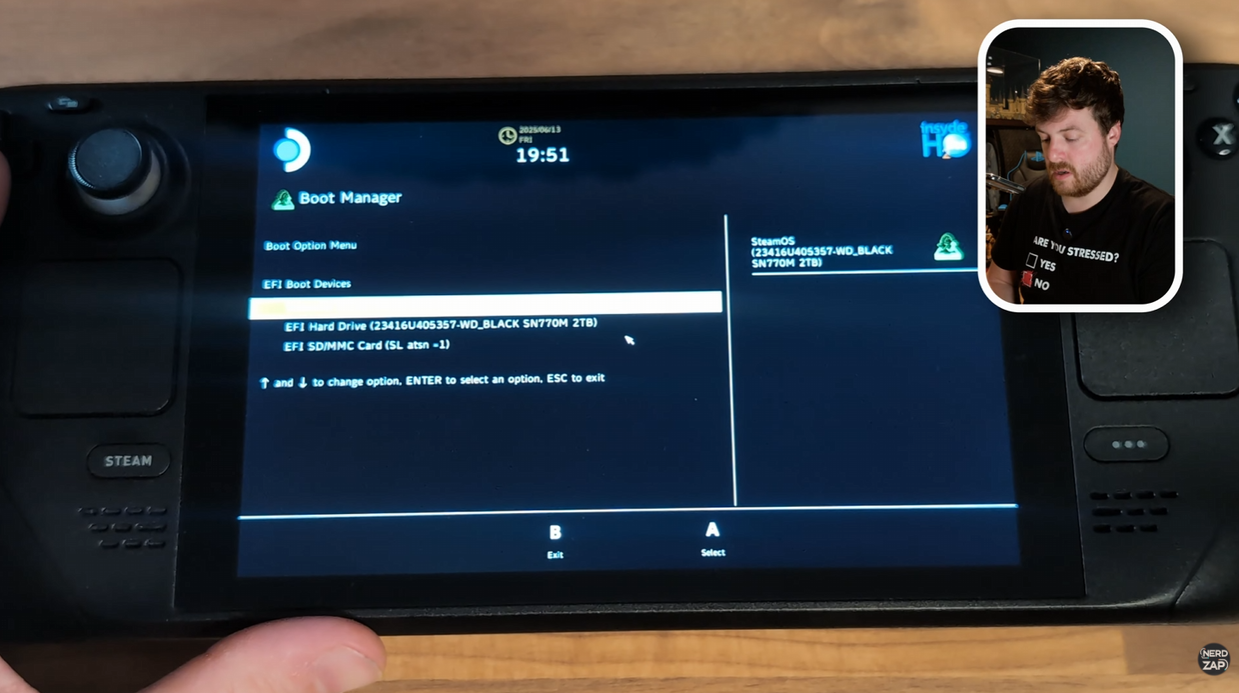
- Hold the Volume Down button and press the Power Button. Keep Volume Down held until you hear the chime.
- In the boot menu, select the MicroSD Card.
The initial boot may take some time or reboot once or twice. This is normal.
Tip: If you are stuck on the boot screen for more than 20 minutes, hold down the power, enter the boot menu again, and select the MicroSD card.
Step 6: Windows Setup & Orientation
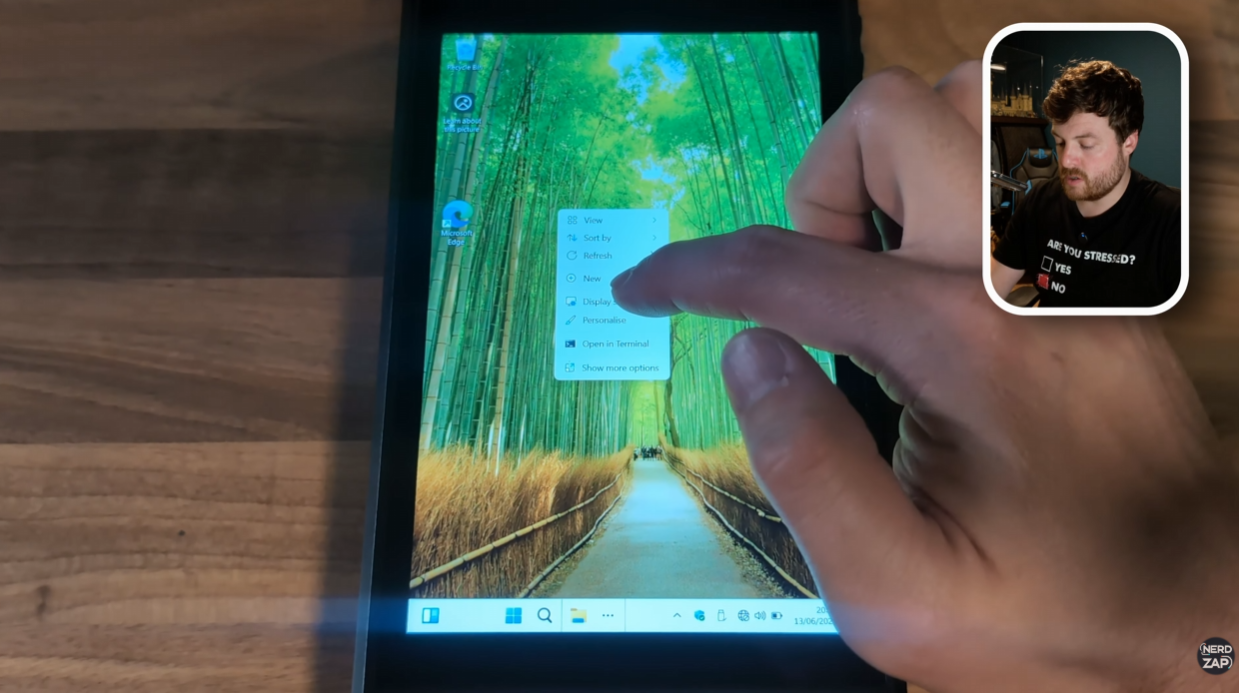
Windows will load in portrait mode. To fix this:
- Complete the basic Windows setup.
- Once on the desktop, long-press on the wallpaper to open the context menu.
- Select Display Settings.
- Change Display Orientation to Landscape.
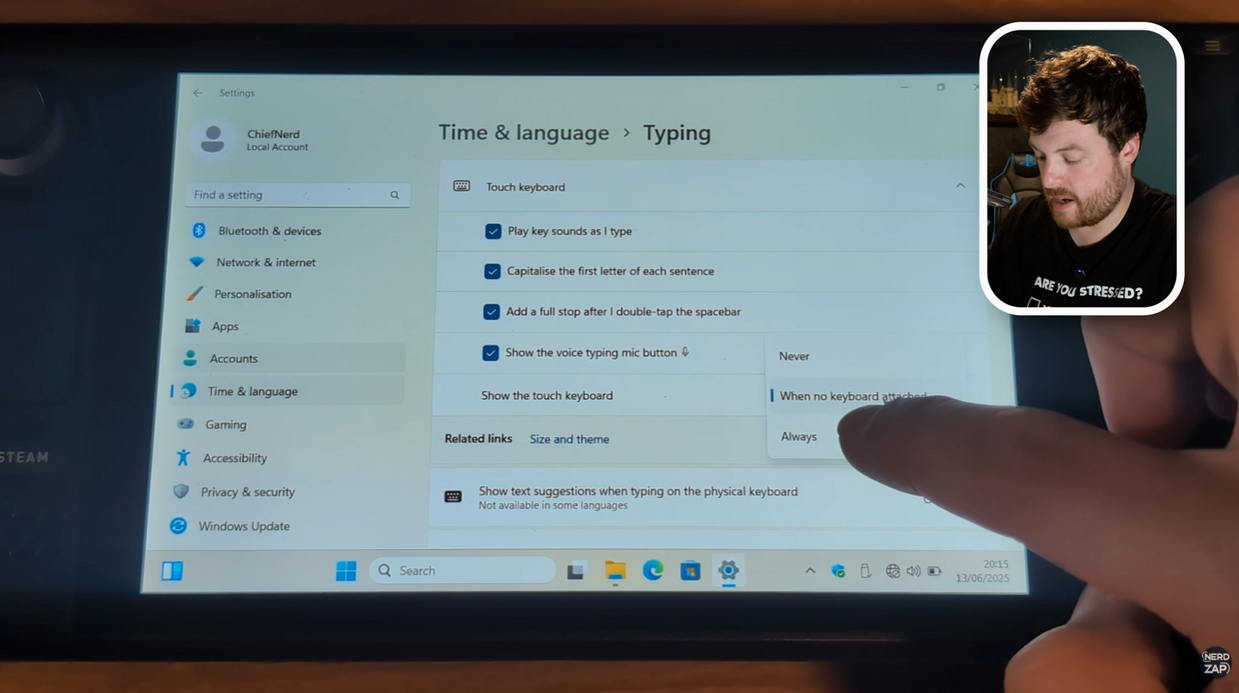
Step 7: Fix On-Screen Keyboard
To ensure the keyboard appears whenever you tap a text box:
- Go to Start > Settings > Time & Language.
- Select Typing > Touch Keyboard.
- Set the option "Show the touch keyboard..." to Always.
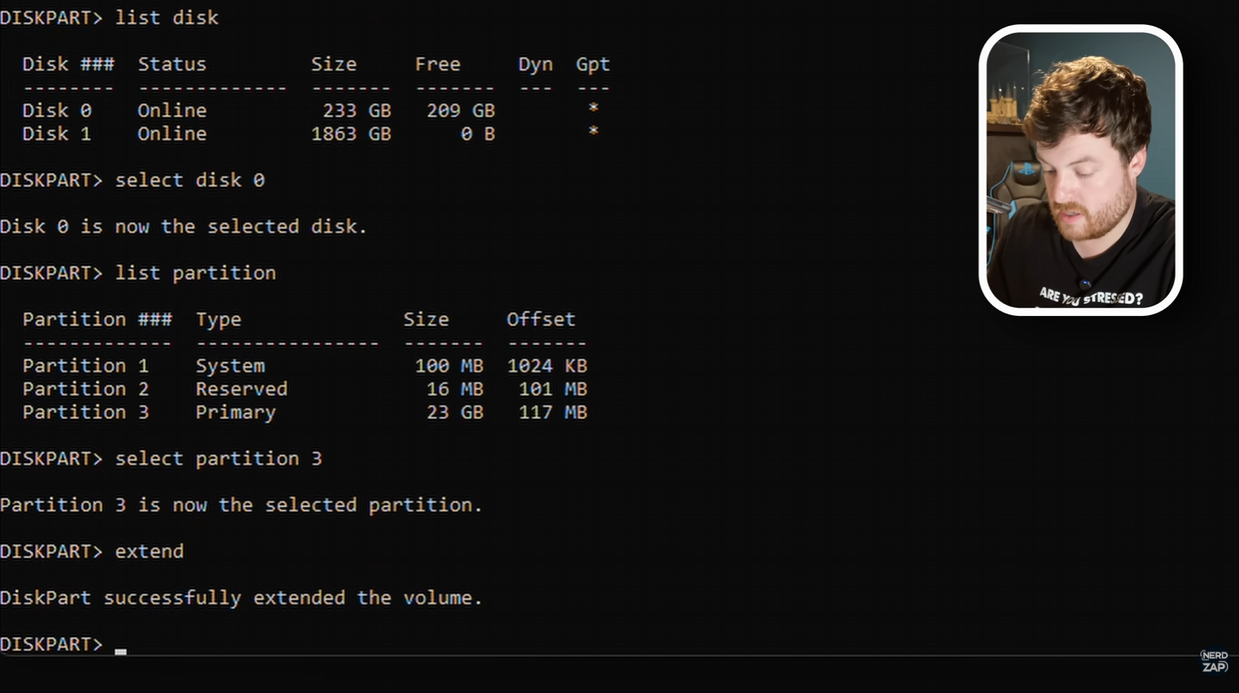
Step 8: Expand Drive Capacity
Windows may not see the full size of your SD card immediately. We must use PowerShell to fix this.
2. Type:
diskpart (Press Enter)3. Type:
list disk (Identify your SD card, usually Disk 0)4. Type:
select disk 05. Type:
list partition6. Type:
select partition 3 (The primary data partition)7. Type:
extendYou should see a message saying "DiskPart successfully extended the volume." You now have access to the full space of your card!
Found this guide helpful?
Support the channel to help me create more tools and guides!